10 Tips on How To Connect Ethernet on Garmin Marine Electronics (2023)
Efficient navigation is an essential component for any marine adventure.
A crucial aspect of this lies in ensuring that your Garmin electronic devices are correctly connected via Ethernet.
With a multitude of gadgets on board, from chartplotters to radar, establishing a proper connection can be a complex task.
In this regard, we have compiled a comprehensive guide to simplify this process.
This blog aims to provide an understanding of various techniques and precautions required to perform this task.
Let’s delve into the world of wires, connections, and marine electronics.
Tips On How To Connect Ethernet On Garmin Marine Electronics
1. Get a Garmin Marine Ethernet Network Cable
Starting your ethernet connection journey with Garmin Marine Electronics requires the right tools, specifically, a Garmin Marine Ethernet Network Cable .
Garmin is a trusted brand in marine electronics, offering a range of devices from GPS units to sonar to Marine network cables that are designed to facilitate data sharing and networking between devices .
The Garmin Marine Ethernet Network Cable makes an essential part of this electronic hardware ecosystem.
Garmin Marine Ethernet Network Cable specializes in creating reliable connections, ensuring efficient data transformation while keeping the performance at its peak.
This cable is explicitly made for Garmin devices, offering unique compatibility and performance .
Garmin Marine Ethernet Network Cables are known for the quality of their physical construction- they are durable and designed to withstand the rigors of a marine environment.
They are water-resistant and weatherproof to prevent damage and ensure that your devices stay connected, irrespective of the conditions on the water.
Using a generic ethernet network cable might not yield the same results or durability.
Therefore, the first tip about getting your Garmin marine devices networked is to get a dedicated Garmin Marine Ethernet Network Cable .
These cables are readily available on the Garmin website or from most quality marine electronics retailers.
The embedded video will further help reinforce the importance of a reliable ethernet cable in a marine setting. It demonstrates how Garmin marine network cables are made to support robust connections between your marine devices.
Moreover, it shows how these cables are crafted with durability and performance at the forefront – making them an integral component of any Garmin marine setup.
A good deal of thought and engineering goes into the design of Garmin Marine Ethernet Network cables – from the way connectors are designed to resist moisture to the way wires are insulated to prevent corrosion.
This is a testament to Garmin’s commitment to providing quality marine electronics that withstand harsh environments while delivering top-tier performance.
As such, when you invest in Garmin products, you’re not just buying a piece of electronic hardware; you’re investing in a company’s mission to provide high-performance, long-lasting marine electronics that deliver ease-of-use and reliability .
This makes the Garmin Marine Ethernet Network Cable a worthwhile purchase as you aim to connect ethernet on Garmin marine electronics.
2. Power off the marine electronics device.
The first and utmost important step before initiating any connectivity process is to power off your marine electronic device .
Powering off the device ensures the safety of both the individual working on the device and the device itself from any accidental damage.
The display of the Garmin marine electronics device usually shows whether the device is switched on or off.
This process involves pressing and holding the power button located on the device until the system goes completely dark .
Make sure to wait a few moments to ensure your Garmin marine electronics device is completely powered down.
It is essential to power off the device to prevent any electrical mishaps and to ensure that the device functions are paused for a trouble-free installation of the Ethernet cable.
Turning off any device before making changes or installations is always a safe practice, as stated in many technology-related FAQs and guidelines.
Being heedful to turn off the device can also prevent unwanted changes or errors during the connection process, ensuring a smooth implementation of the Ethernet on your Garmin marine electronics.
Respecting the device’s safety precautions like this one can ensure longevity and upkeep of the equipment.
There might be instances when the device does not switch off instantly; in such cases, it’s wise to consult the manufacturer’s guidelines or seek professional help.
In case of any uncertainty about whether the device is off, always double-check and ensure it’s powered off before starting the process.
Therefore, the rule of thumb is to always power off your marine electronic device before starting any connectivity process, include installing or connecting an Ethernet cable—it’s a small step, but a crucial one to keep your device safe and maintain its performance.
With the Garmin marine electronics powered off, you are now ready to proceed with the next steps of connecting Ethernet.
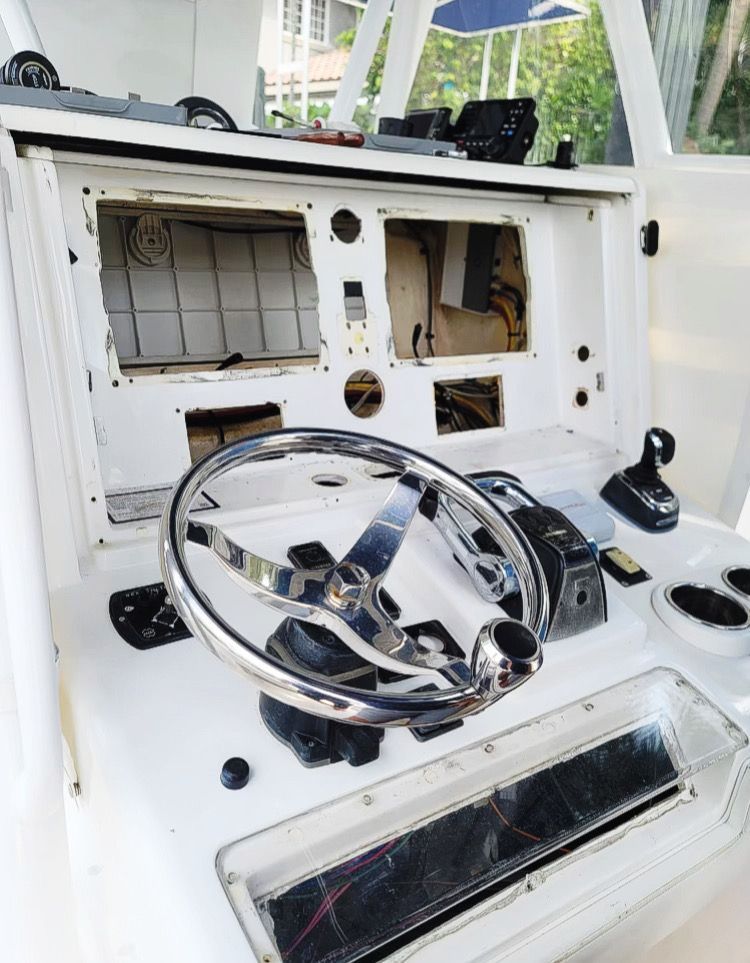
3. Plug one end into the GPS port.
The first step in establishing a connection between your Garmin marine electronics device and the ethernet is to plug one end of your Garmin Marine Ethernet Network Cable into the GPS port on your device.
Before connecting anything, always make sure that your device is turned off. This is important for safety reasons and also to ensure that you do not cause any damage to your device.
Most GPS ports are situated at the back of the marine electronics device. Refer to your device’s user manual if you have trouble locating the port.
The GPS port is essentially a gateway that allows for a link between the device’s GPS functionality and the ethernet.
The act of plugging the ethernet network cable into the GPS port initiates the connection process . Remember, if the initial plugging step is flawed, then the network would not be able to recognize your device.
To ensure a proper connection, make sure to securely insert the cable into the port. A loose connection can be worse than no connection at all and may lead to inaccurate information being transmitted, damaging both your device and your marine adventures.
A useful tip while plugging in is to hold the cable end firmly and insert it straight into the GPS port. Avoid angling the cable as it might damage the plugs inside.
While plugging, always take your time and connect carefully . The process is not complicated, but rushing the process could lead to forced or incorrect plugging could lead to technical issues.
The connection you establish with the GPS port should be a fully embedded one for optimal results. That means the cable’s end should completely fit into the GPS port without leaving any space.
This beautifully shot video provides insight into this process:
Watching this video will help you understand the process more visually . It can also help in resolving any doubts about the orientation of the GPS port, and correct ways of plugging in the marine ethernet network cable.
Once the cable is solidly connected to the GPS port, the device’s GPS functionality interlocks with the capabilities of the ethernet. The GPS port now has a pathway for data transmission, which is a crucial step towards creating a connected marine network .
By meticulously following the aforementioned steps, you’re on your way to a successful Garmin Marine Ethernet connection. With this, not only will your device be more functional but your safety in the marine environment can be significantly enhanced.
Keep in mind that the user manual of your device is an incredibly useful resource. If you encounter any difficulties, you can always refer to it for troubleshooting suggestions or contact Garmin’s customer service.
4. Connect the other end to the ethernet port.
Connecting the other end of the Ethernet cable to your marine electronics device’s Ethernet port is a very important part of the setup process.
The Ethernet port on such devices enables faster and more reliable data transfer compared to wireless connections.
It’s important to locate the Ethernet port correctly on your device. Most Garmin marine electronics devices have the Ethernet port placed in an easily accessible area to facilitate easy connection.
The Ethernet port is typically marked with the universally recognized ‘Ethernet’ symbol or word. If you’re having trouble finding the port, consider referring to the device’s manual as it often provides diagrams and descriptions about the location and usage of different ports.
When you’ve located the Ethernet port, take the unconnected end of the Ethernet cable and plug it into the port. Ensure that the connector goes in completely without forcing it.
Ensure that the Ethernet cable’s connector goes in smoothly into the connector port. Doing so avoids potential damage to both the cable and the port.
This means that if you encounter resistance while trying to plug in, do not use force. Check if you’re trying to insert it the right way, as Ethernet cables are not designed to be plugged in any direction .
If the cable still doesn’t fit, there may be an issue with either the cable or the port. Seeing a professional for further advice is recommended in such cases rather than attempting to force the cable into the port.
Once the Ethernet cable is successfully connected to the Ethernet port, make sure it’s secured properly . Ethernet cables are designed to click or snap into place to prevent accidental disconnections.
Physical integrity of the connection plays a crucial role in the performance of the Ethernet network. A loose connection can lead to intermittent data flow or even complete network failure.
Therefore, it’s essential to make sure that not only is the Ethernet cable plugged in correctly, but also that it is securely locked into the Ethernet port .
Once the Ethernet port is correctly connected, the device’s indicator light (if available) should glow or blink, signaling that the device is ready to establish an Ethernet connection with the network.
Remember, despite the straightforwardness of the process, if at any point you’re unsure about how to connect the Ethernet cable, it’s always wise to refer back to the device’s manual or seek help from a professional.
A properly connected Ethernet cable helps ensure that your Garmin marine electronics are fed with steady and continuous data , which ultimately plays a significant role in the overall performance of the device.
5. Ensure a Solid Connection to Avoid Interruption
When installing your Garmin Marine Ethernet Network Cable, ensuring a solid connection is utmost important to avoid any potential issues or interruptions that may arise from a loosely attached cable.
Safety and accuracy are key when dealing with marine electronics, and a solid ethernet connection is no exception.
When connecting your Ethernet cable, it should slide into place securely , with no excess looseness or movement that could implicate a weak connection.
Additionally, you may want to consider using a ferrite bead when connecting your Ethernet Cable.
A ferrite bead is a type of electronic component that suppresses high-frequency noise in electronic circuits. By watching this video, you will gain valuable knowledge on how to install a ferrite bead on Garmin marine cables to maintain a better connection.
Proper utilization of a ferrite bead can further enhance your device’s connectivity and performance while reducing the chances of data loss or malfunctions due to connection issues.
A smooth and well-adjusted connection not only improves the performance of the device but also prevents potential damage that could occur as a result of a loose connection.
This quote emphasizes not only the importance of a secure connection for excellent performance but also for the longevity and damage prevention of your device.
Maintaining a robust connection is also essential for the successful transmission of data between your device and the Ethernet connection.
An unstable connection could lead to incomplete or inaccurately transmitted data, which could cause significant issues when using your Garmin Marine Electronic device in a marine environment.
Always double-check your connections, ensuring they are tight and secure.
Remember, a little bit of extra carefulness goes a long way in ensuring the successful operation of your device and avoiding unnecessary hindrances.
The goal here is to achieve a seamless and uninterrupted flow of information between the network and the marine electronic devices which is essential for its overall performance.
However, it’s also important to remember that ensuring a solid connection doesn’t end with your initial setup. Make a habit of regularly checking your connections for any visible signs of wear or damage to keep your system running smoothly.
Keep all these points in mind when ensuring your Garmin Marine Ethernet connected devices are correctly set-up, and rest assured knowing that your device is primed for optimal performance.
6. Power on the marine electronics device.
After ensuring all your cables are properly connected , it is now time to power on your marine electronics device. This step significantly marks a new phase in the process of setting up your Ethernet connection on your Garmin Marine Electronics.
To do this, you first need to locate the power button on your device. This might seem like a simple process, but it is essential to get it right. Finding the power button can vary depending on the model, but it commonly located on the device’s front panel.
Once, you’ve located the power button, you’ll want to apply gentle pressure to it until you hear a click or see a light indicator which signifies that the device is powering on. Don’t force it, if the device doesn’t power on, check your cables again or consult your device handbook.
Supporting the last statement, it’s vital to consult your manual whenever you encounter problems. The manual includes intricate details of your device operations, including the powering process, which can be particularly helpful to prevent any damage. Be patient and don’t rush the process; it’s better to be safe than sorry .
When your device starts powering on, it will take a few seconds to a minute to fully initialize . This duration depends on the specific model of the marine electronics. To know that your device is correctly initialized, you’ll commonly observe a welcome screen or logo before switching to the home screen.
It’s important to remember that getting your device to power on does not mean the Ethernet connection has been entirely established. This is merely a step in the process, but it is an essential step all the same. Navigate through your device to check for any initial prompts or notifications.
You might notice that the system will conduct a series of self-checks . This is a normal process in electronic devices at startup. For your Garmin Marine Electronics, these checks help to ensure that all functions are working correctly, and there are no initial software issues.
Whenever the self-checks are successful, the home screen will appear, indicating it’s ready to be used. Nevertheless, the Ethernet connection setup is not finished yet; there are other steps to cover to complete the Ethernet connection setup. The most notable procedure is the system running a network test and reconfiguring settings if the connection fails.
This is to remind you that the process is elaborate and well thought out in its sequence. Each task prepares for the next and so on. The detailed procedures are purposeful to adequately ensure the connectivity is reliable and lasting.
Therefore, powering on the marine electronics device is an essential step in ensuring the connected devices can communicate . It is the action that brings the network to life. However, it is not the end, and your attention should not dwindle.
Recheck all the information you have been following correctly. Be sure that all other devices you are connecting are indeed compatible with your Garmin Marine Electronics device. Compatibility is key in this case to ensure a smooth process.
By following the correct steps and paying attention to these tips, you should successfully be able to power on your marine electronics device. However, do remember that even though this step might be complete, you still have other steps to follow to fully establish your Ethernet connection on the Garmin Marine Electronics.
To recap, understanding how to power on the device is a pivotal step in the Ethernet connection process. It is the bridge between the physical connective setup and the internal configuration of your Garmin Marine Electronics system. Thus, take your time and get it right !
7. Verify That The Network Recognizes The Device
Upon connecting your Garmin marine electronics to ethernet, it is essential to verify if the network recognizes your device .
This process is crucially important to ensure that the connection process has been successful and the device is communicating adequately with the network.
Network recognition is a process that confirms the presence of your device on the network .
This will also unearth if there are any issues related to device visibility, connectivity or network performance that can be rectified at an early stage.
There are various ways a network could present a connected device, and its presentation may differ based on the router or switch being used.
One of the common ways to check if your device is recognized is by accessing the router’s admin panel.
A router admin panel usually displays all the connected devices in the LAN section , you can cross-check the IP address or device name in this list.
Additionally, some routers also provide a connectivity map showing all the devices connected to it.
The specific way to verify device recognition on the network may vary based on the network and device setup.
In some cases, the device might not be recognized if the network cables are not properly connected, or if the device configurations are not done correctly.
At such times, you may need to re-adjust your connectivity setup and retry the verification process.
This video provides significant insights into connecting your marine electronic devices to the network.
It gives a clear understanding on how to effectively manage your ethernet connection.
Remember, verification of network recognition is a crucial process in ensuring that your Ethernet connection on Garmin Marine Electronics is adequately set up.
It helps in identifying any potential issues early in the setup process and aids in maintaining a stable and effective ethernet connection.
8. Check for software updates upon connection.
Once your Garmin Marine electronics device is connected to the Ethernet network , it’s crucial that you check for any available software updates.
Software updates can make a significant impact on the functionality and reliability of your connected device.
Garmin frequently releases software updates that improve product performance , add new features, and enhance existing ones.
Failing to perform these updates may result in glitches or discrepancies in usage over time.
Updating software is not meant to be a complicated process, it is designed to be user-friendly and straightforward. Garmin also provides step-by-step instructions for manually checking for software updates.
You can download and install software updates directly from the Garmin website or through Garmin Express , a free software that manages your devices.
Installing software updates is important, as updates can fix bugs that may be present in the software. It is akin to servicing your car regularly for optimum performance.
If you experience difficulties during the update process, it’s advisable to reset your device and try again.
Never unplug or turn off your Garmin device while a software update is in progress. Doing so can cause permanent damage to your device.
Remember that it is paramount to keep your Garmin device up-to-date. Just like your smartphone or computer, your marine electronics device benefits from having the latest software.
Some updates may take longer than others, depending on the size of the update and the speed of your internet connection. Do not be alarmed if an update takes some time to complete; this is completely normal.
Occasionally, after a software update, your Garmin device may restart. This is simply the device integrating the new software and should not cause concern.
In a nutshell, checking for software updates upon connecting your Garmin Marine electronics device to Ethernet is not just a recommended step but is also an essential part of maintaining your device’s optimum performance and reliability.
Updating the software will help ensure you get the most out of your Garmin device , enabling the best possible experience for your marine activities.
9. Perform a System Network Test
To ensure the successful connection of your Garmin Marine electronics to the Ethernet, it is crucial to perform a system network test .
This involves running a series of checks on your device and network to confirm that they are communicating effectively.
This procedure also verifies data transmission between the two crucial aspects.
Running a system network test is done by accessing the network settings on your Garmin device.
You will find an option for a network test or a similar term. Click on it to begin the process.
Once clicked, the device will initiate the test, during which it utilizes various algorithms to measure the stability and speed of the connection.
The process goes on in the background and you can continue with your navigation tasks as it takes place.
This feature allows you to spot any possible issues such as high latency, packet loss, or general unstable connection.
Once these problems have been identified, you are able to address them immediately.
It will also provide you details on whether any firewalls or routers are posing any issues.
You can then make necessary adjustments to these to ensure seamless data transmission.
Remember, it’s always better to be proactive in spotting potential issues rather than reactive.
Regular system network tests also ensure that you’re getting the best from your Garmin Marine Electronics.
Performing these tests is an integral part of maintaining healthy device functioning as well as ensuring maximum connectivity uptime.
By watching the above video, you can learn about the basic troubleshooting tips for marine electronics.
It also offers insights on how to maintain optimal performance of your marine electronics system.
10. Reconfigure Settings If Connection Fails
If the connection fails , you might need to reconfigure the settings of your Garmin Marine Electronics device. Any electronic device can exhibit unpredictable behavior due to multiple reasons, and network connection issues are quite common.
Power cycling your Garmin Marine Electronics device might sometimes resolve the issue. So, before deciding to reconfigure settings, it’s always better to turn off and then turn back on your device to see if it restores the connection.
Network jitter or intermittent connectivity issues may lead to a failed connection. Restarting the device could often resolve such connection problems.
In support of the statement above, it’s important to understand that network connectivity issues can often be volatile or sporadic. Hence, a simple restart could save you from the tedious task of reconfiguring the entire settings of your Garmin device.
Also, all electronic networks, including those of Garmin Marine Electronics, are susceptible to temporary glitches. A power cycle could eliminate such glitches and ensure smoother connectivity.
If a restart didn’t help, your device may require a reset to its factory settings to resolve the connectivity issue. However, it’s crucial to understand that resetting your device will erase all your personal settings and previous configurations.
It’s always advised to backup any important data before you decide to reset your device. Once the reset is complete, you can then reconfigure the settings and then try connecting your device to the Ethernet again.
While going through the resetting and reconfiguring process, be patient and attentive. Missing out on any instruction or rushing through the steps could lead to more complex issues or even permanent damage to your device.
A meticulously performed reset can bring back your device to its original state and remove any issues that might be causing the connection problems.
The above statement emphasizes the importance of a careful and detailed approach while resetting your device. Because after a proper reset, your Garmin Marine Electronics device should be free from any configurations or settings that were potentially causing the network issues.
Also, the resetting process may take some time, and it may seem like the device is not working. Keep in mind that it’s a normal part of the process, and there’s no need to panic.
Even after reconfiguring the settings, if your Garmin Marine Electronics device still fails to connect to the Ethernet, the problem could be more severe. It might be hardware-related or due to a more complicated technical glitch .
In such cases, it’s better to seek professional assistance rather than trying to solve the problem on your own. Professional technicians possess the necessary knowledge and experience to diagnose and repair electronic devices.
The Bottom Line
Hence, establishing a successful connection between Garner Marine Ethernet Network Cable and your marine electronics device can lead to optimal device performance.
Powering off the device during setup, ensuring the cable is plugged into the correct ports, and confirming a stable connection is vital for avoiding interruptions.
Once the device is powered on, it’s critical to verify its recognition within the network and update any software immediately.
A proper system network test will confirm its effectiveness and in cases where the connection fails, reconfiguring settings can often resolve the issue.
Following through these steps diligently will ensure a smooth, efficient operation of your marine electronics device.
Contact Us
Contact Us
Recent Posts

CONTACT US
Looking to upgrade your marine electronics?
With more than 25 years of experience, we can help you get started today!